Mark's Online Puzzle Pages
|
Mark's Online Puzzle Pages |
|
 |
 |
 |
 |
 |
 |
|
| Solutions Page |
Last updated:Jan 23, 2009
|
|||||
| Fiendish15 Dial Trouble Reverse Pegs Arrow 4x4x5 Cuboid Rubik's Mate (3x1x1 edge bandage) |
| Fiendish15 This puzzle is always soluble. Notation
examples: Notes: Level 1
Level 2 This proceeds like level 1 until step 13, except that when a slider is in the wrong orientation it might have to be taken twice along the path indicated in level 1. This is because there are two wrong orientations for a slider. Step 13: Move all the bottom row to the left. a) If solved start new game b) If S13 not in correct position: 9D, 10L, 11L, 12L, 9R, 10D, 11L, 12L. Now move S13 to B15. Then move 12R, 11R, 10U, 9L, 12R, 11R, 10R, 9U, 13L, 14L, 15L. If solved start new game.
Five not aligned pointing the same way – get the five sliders in question into B10,B11,B12,B14 and B15 (B16 empty). Rotate this ring clockwise or anticlockwise as necessary. Then return the sliders to their correct positions along the same paths they were brought together on. Back to top Level 3  Note that B3 and B8 contain identical sliders. If you cannot complete the puzzle as illustrated you will have to swap those two pieces. Back to top |
| Dial
Trouble
Terminology SR: small rings clockwiseSL: small rings anticlockwise LR: large ring clockwise LL: large ring anticlockwise A: SL, LL, SL, LR B: SR, LL, SR, LR P0: position of 0 when solved P1-P9 likewise Note that the sequence ABBA swaps 7 with 2 and 0 with 1. First get 8 and 9 into position. This should be easy. Ensure 6 is in the main ring. Use ABBA if necessary. Next get 5 next to the 6. If 5 is in P0 place it in the main ring thus Ensure 6 is not in P1, P2 or P7.
ABBA
If 5 needs to be moved 1 space
clockwise Put 6 in P3. SR ABBA SL
If 5 needs to be moved 2 spaces
clockwise Put 6 in P3. ABBA
If 5 needs to be moved 3 spaces
clockwise Put 6 in P4. ABBA. Put 6 in P3.
SR
ABBA SL
If 5 needs to be moved 4 spaces
clockwise Put 6 in P5. ABBA. Put 6 in P3.
ABBA
If 5 needs to be moved 5 spaces
clockwise Put 6 in P6. ABBA. Put 6 in P4.
ABBA.
Put 6 in P3. SR ABBA SL
Then get 4 next to the 5. Adapting the moves from the previous step.If 4 is in P0 place it in the main ring thus Ensure neither 5 or
6 is in P1, P2 or P7. ABBA
If 4 needs to be moved 1 space
clockwise Put 5 in P3. SR ABBA SL
If 4 needs to be moved 2 spaces
clockwise Put 5 in P3. ABBA
If 4 needs to be moved 3 spaces
clockwise Put 5 in P4. ABBA. Put 5 in P3.
SR
ABBA SL
If 4 needs to be moved 4 spaces
clockwise Put 5 in P5. ABBA. Put 5 in P3.
ABBA
Then get 3 next to the 4. Adapting the moves from the previous step.If 3 is in P0 place it in the main ring thus Ensure none of 4, 5 or 6 is
in P1, P2 or P7. ABBA
If 3 needs to be moved 1 space
clockwise Put 4 in P3. SR ABBA SL
If 3 needs to be moved 2 spaces
clockwise Put 4 in P3. ABBA
If 3 needs to be moved 3 spaces
clockwise Put 4 in P4. ABBA. Put 4 in P3.
SR
ABBA SL
Then get 2 next to the 3. Adapting the moves from the previous step.If 2 is in P0 place it in the main ring thus Ensure none of 3, 4, 5 or 6 is
in P1, P2 or P7. ABBA
If 2 needs to be moved 1 space
clockwise Put 3 in P3. SR ABBA SL
If 2 needs to be moved 2 spaces
clockwise Put 3 in P3. ABBA
Finally At this point you have the 0,1 and 7 in the upper small ring. If these are in the correct position the puzzle is solved.If not the following sequence will rotate the upper ring anticlockwise (apply once or twice): LL ABBA LR ABBA LL SR ABBA SL ABBA LR |
| Reverse Pegs Notation P1-P12 = Possible peg positions starting at the leftT = rotate nL1 = move peg in Pn left by 1 mL4 = move peg in Pm right by 4 etc Level 1 This should be fairly simple – I'll give a solution for the fixed start position shown. To obtain the fixed start position press f on the java version of this puzzle.
For the first 4 pegs work from left to right. 1.
move yellow from P12 to position P1:
12L4 T 2R3 T 1R4 T 6L2 T 3R2 T 5L4
Now work right to left, leaving pegs 1 to 4 untouched. 5.
move green from
P7 to P12: 6R1 T 10L2 T 8R4

Level 2 This is similar to Level 1. However once you have completed the first four pegs every second rotation will swap 2 and 4. Thus you may end up in one of two positions (unless you have solved it).One (2 and 4 reversed)
10L2 T 5R4. This will put you in position two – proceed as below. Two (9 and 10 reversed)
The principle is to get pegs 9-12 in the reverse order using an odd number of rotations, then move them to the large ring to rotate them into the correct order. The whole sequence therefore uses an even number of rotations. Level 3 Start from the left getting pegs 1-4 in order. Then working from the right attempt to get pegs 12-10 in order. Remember every second rotation leaves 2 and 4 swapped. Here are the main positions you might end up in
T 9R1 (now you're in the position shown below)
10L2 T 12L1 T 8R2 T 12L1 T 9R1 (*) This move leaves all other pegs in the same position! At this point consider the remaining three pegs: 5, 8 and 9. If they are in the right order, just slide them into position. Otherwise use the moves below as required until the puzzle is solved. This move takes whatever is in position 5 and puts it in position 8: 12L2 T 5R1 T 5R2 T 12L1 T 11L1 T 8R1 T 9R1 So if you have:  you end up with:  (In this particular example the puzzle is actually solved – just slide the three pegs into position.) However if you cannot solve the puzzle by the one or two applications of the move above you will have to use the swap move below first. This move swaps the pegs in 5 and 6: (The principle here is to move 5 and 6 into the small ring, apply the swap above (*) then return the two pegs to the large ring) 11L2 T 7R2 T * T 10L1 T 7R2 T 9L1 T So if you have:  you will end up with:  This particular example is solved. |
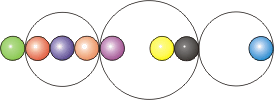
| Arrow Notation Simple Moves L=
move shaft left,
R= move shaft right, C= spin the arrow head clockwise, A= spin the arrow head anticlockwise. 2L= shorthand for L L etc 2C= shorthand for C C etc *L= move shaft fully left *R= move shaft fully right Position Numbers
8
1 2 3 4 5 6 7 . . . . 9 Key Position Names 7
= Point
8 = Top Tip 9 = Bottom Tip 7,8,9 = Tips 5,6,7,8,9 = Spinner 1-7 = Shaft Colours at each position 1
= Red
2 = Orange 3 = Yellow 4 = Green 5 = Blue 6 = Magenta 7 = White 8 = Light Magenta 9 = Dark Magenta Useful sequences Top
Swap (TS)
4R
2C 2L 2C 2L C 4R 3C 2L C 2L
This sequence will swap 8 and 7 (level 1) If applied twice the effect is to invert 7 and 8 (level 2) Bottom Swap (BS) 4R
2C 2L 2C 2L 3C 4R C 2L 3C 2L
This sequence will swap 7 and 9 (level 1) If applied twice the effect is to invert 7 and 9 (level 2) Point Swap (PS) 4R
C L C 2L 3C 3R C L 2C 2L C R 3C 2L C R 3C L 2C
This sequence will swap 6 with 7 and 8 with 9 (level 1) Point Rotate (PR) 2R
C 2L 3C 2R 2C 2L 2C
This rotates 7,8,9 anticlockwise (level 1) Quarter turn (QT) R
C L 2C R C L 2C
This orients 5 and 7 from up/down to left/right (level 3) Half turn (HT) 3R
C 3L 2C 3R C 3L 2C
This orients 3 from left to right (level 3) Level 1 To get started Working
from left to right get Red, Orange, Yellow and Green into position.
Move the shaft fully left. Blue If
Blue is not at the centre of the Spinner, spin it into position.
Otherwise use Point Swap and spin Blue into position. Magenta If
this is in position move on to solve the Tips.
If Magenta is at the Point use Point Swap If Magenta is at the Top or Bottom Tips, use Top Swap or Bottom Swap to get it to the Point, then use Point Swap Solve the Tips (Light Magenta, Dark Magenta, White) Use
Top Swap
and Bottom Swap
to sort them out
Level 2 To get started Working
from left to right get Red and Orange correctly positioned and oriented.
Get
Yellow and Green into position, but not necessarily correctly
oriented (the orientation will change in the steps below).
Blue If
Blue can be spun into position, do so.
If Blue is is the centre of the spinner use: R C L TS R C L Magenta From
now on we apply useful sequences in pairs, sometimes with simple
moves before, between and after. This preserves the orientation of
completed colours
If Magenta is in position move on to Final Stages. If Magenta is at the Point: C
PS 3C PS
Spin
Blue into position
Move on to Final Stages If
Magenta is at Top or Bottom Tips
Use
Point Swap
Rotate
Magenta to Point
Use Point Swap again Spin Blue into position Move on to Final Stages Final stages If
Yellow is pointing the wrong way: 2R C 2L TS TS 2R 3C 2L
If Green is pointing the wrong way: R C L TS TS R 3C L If Magenta is pointing the wrong way: PS PS Get the 3 tips (Light Magenta, Dark Magenta, White) into position with an even number of Top Swaps and Bottom Swaps. This might involve swapping the blue. If Blue is pointing the wrong way: C TS TS 3C If Top Tip and Point are pointing the wrong way: TS TS If Bottom Tip and Point are pointing the wrong way: BS BS If Top and Bottom Tips are pointing the wrong way: TS TS BS BS Level 3 To get started Get
Red in position and correctly oriented.
Working
from left to right get Orange, Yellow, Green in position and oriented
either left or right (not up or down)
Blue If
Blue is in centre of spinner:
Use
PS to swap it with another colour.
Rotate the spinner and use PS again (to keep O,Y,G oriented left or right) Spin blue into position Magenta (Centre) If
in centre move to next stage
If not in centre use PS twice (once on Blue, Dark Magenta, Light Magenta or White, secondly on Magenta) White, Dark Magenta, Light Magenta If
all in position move to next stage
If not in position use TS twice intermixed with C. Reorient balls that are pointing up/down to be left/right If
Magenta Centre is up/down use PS PS
If 5 and 7 are up/down: QT If 8 and 9 are up/down: C QT A If two adjacent balls of 5,7,8,9 are up/down: spin
the balls into positions 5,8
TS QT TS spin the balls back to their original positions Finally reverse any balls that are pointing left Clever
use of HT can now reverse any ball in pointing left.
Here is an example to reverse ball 8 (gets ball 8 to 3, reverses it and returns it to its proper position): 2R
A 2L
HT 2R C 2L Back to top |


 T 8R2
T 8R2


