| [fig 4] | [fig5] |
 You can see in fig 5 that your text |
 |
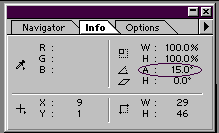
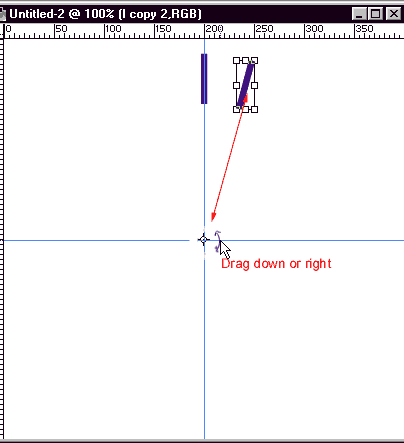
4.Make sure the info pallet is visible, so that you can make sure you rotate to the right angle.[fig 4]I put a letter every 15 degrees here, but you can put them farther apart than that if you wish. The shift key will constrain them to angles 15 degree increments. 30° and 45° and so on now, with the circle in the middle, the handle should look like the rotate handle,[fig5], the curve with arrows on each end..drag down or clockwise, to rotate the layer. hold the shift key to constrain it, stop when it is at the angle you want. (in this case 15° [fig4] and hit enter to accept the transformation.
| [fig 4] | [fig5] |
 You can see in fig 5 that your text |
 |
5. Now, just as you did with the first layer, drag the top copy to the new layer icon to copy it, click on edit transform rotate, pull the center of the tool out and down to the center of the image as shown if Fig 5 above, and hold the shift key while you drag down and right, (or clockwise) 15° . Look at the info pallet as before to verify the angle..and again press enter to accept the transformation. Continue this process until the l's go all around the circle.
Then when you have that done, you will see that Photoshop has placed the letters for you in a perfect circle! Uh oh..but they are all L's! That's ok, we didn't render the type..as long as you don't render the type in Photoshop 5, you can still edit it. I saved my file as a PSD file, so that I can use it again and again to make circular text. I made it as big as I thought I would ever need it, because you can always resample the image to make it smaller when you are finished..And if you just want a half circle or curve, you can just use that much of it and leave the rest. OK, now on to the fun part of the tutorial. Turning it into text.!