|
|
|
|
|
This site will no longer be updated, please visit http://pixle-tickler.com instead. | |||||
|
|
|||||||||||||||||||||||||
|
|||||||||||||||||||||||||
|
Step 1: Start out with a new image at least 500 x 500 with a transparent background. I always start out large and the resize smaller as needed. With your selection tool set to the circle (feather unchecked), find the center of your image and using the rulers as a guide, draw a circle by pulling your cursor towards the top of you image but try to keep the dimensions between the 100 and 400 markers. See image below. |
|||||||||||||||||||||||||
|
|
|||||||||||||||||||||||||
|
|||||||||||||||||||||||||
|
|
|||||||||||||||||||||||||
|
Step 3: You may now notice that you have a flower in the center of your image, but have some stray pieces around the edges that you don't want. There's a couple of different ways to get rid of those stray area, but since part four is going to use the inner bevel tool this is what I suggest doing: Use your magic wand with the settings set at all opaque, no feathering and click once on each petal. If you hold down the shift key while doing this, you can select each petal. When you have selected everything that you want to save, go to the selections menu and invert your selection. Hit the delete key on your keyboard, then invert your selection again so that the marching ants are back around your petals. |
|||||||||||||||||||||||||
|
Step 4: Now to add some depth to your flower. You should still have your petals selected. To me, the bevel settings look best when they are a little soft, but you can use stronger depth settings than I used. When you are satisfied with your settings, go back up to the selections menu and select none. |
|||||||||||||||||||||||||
|
|
|||||||||||||||||||||||||
|
Step 5: Add a new layer to you image and use your circle selection tool again to draw a smaller circle in the middle of your flower. Flood fill it with either a solid color, pattern, etc, and then use the same bevel settings as you did on your petals. Go up to selections and unselect your selections. If you need to, use your mover tool to center. Merge visible. |
|||||||||||||||||||||||||
|
~Voila!~ You're done!!! |
|||||||||||||||||||||||||
|
I'm going to be evil and say it's up to you to decide what to do with it next. |
|||||||||||||||||||||||||
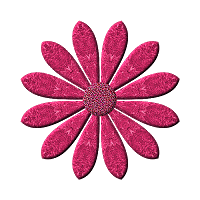
| Flower result from tutorial | Different settings | This was originally a photo | |||||||||||||||||||||||
 |
 |
 |
|||||||||||||||||||||||
|
Download the PDF of this
tutorial here. Download Free Acrobat Reader here. |
|||||||||||||||||||||||||
 |
|||||||||||||||||||||||||
| Updated 02/06/02 | |||
| Copyright ©
1999-2002 All rights reserved. All graphics on this site are property of Pixel-Tickler and are protected under US and International copyright laws and may NOT be copied, stored or offered for sale without written permission from the owner unless so stated otherwise. PSP tutorial groups may use these tutorials as part of their weekly lessons. If you have any questions regarding the content or images used on this site, drop me a note at news://news.annexcafe.com/annexcafe.psp.tutorials. I browse there regularly. |
|||