N69RJ's Wheelpant Design
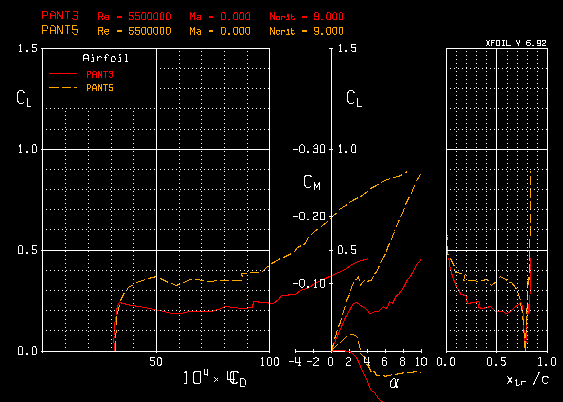
back to the Pitts home pageThe wheel pants on N69RJ are a custom airfoil developed specifically for the Reynolds numbers and flight conditions associated with the Reno Air Races. The airfoil minimized Cd over a range of alpha that is reasonable for the application. It is an airfoil that sacrifices a smooth Cl/Cd relationships for the sake of lower overall Cd. That means it's not great for a wing, but it's perfect for a fairing.

The airfoil was developed by Professor Ashok Gopalarathnam at North Carolina State University (NCSU) Department of Aeronautics. We call it the AG-5 airfoil.
Construction steps:
Some wheel pants designs from some very fast airplanes. Too bad the formula guys have to use full-size 5" tires. Note the reflexed trailing edge, commonly referred to as "pressure recovery". Without giving anything away, let's just say that not all pressure recovery is the same ;-)


I printed full-sized digital photos to get lofting information. These are the Cheng Shin (aka Lamb) tires that are 11x4.00-5 tires that fit 5" cleveland rims. With these tires, I can use the same size wheel-pants and have the cover the brakes.


Plug photos - Note the sloppy Monokote finish that I used when my high-tech filler of choice (sheetrock compound) disintegrated under laquer primer.


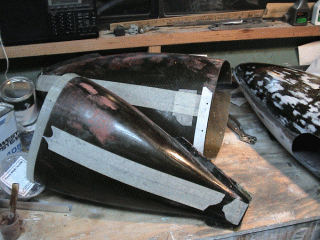
The molds and the first product (1x1.5oz veil glass + 2x 5.7oz carbon). The second half didn't release so nicely. Although the piece is fine, the mold will need to be rebuilt. Bummer. Here is a finished part on top of the two molds.

Vacuum bagging supplies: First the vacuum tape, which is like a strip of bubble-gum, then the hand pump, then the refrigerator compressor. The hand pump can draw 25" Hg vacuum, but I found that getting every last leak out of a decent sized vacuum layup was virtually impossible. So unless you want to sit and pump for 12 hours, I'd advise not relying on that. The refrigerator compressor was free, pumps 25 inches, and will run forever. Duh. Now the hand pump makes a pretty good $45 vacuum gauge.


Vacuum setup in action on a wheel-pant half. Note the white breather and the peel-ply underneath. I think this was the one I tried West Systems epoxy on, which ended up being not nearly as strong as my 8 year-old Epolite.
Also note the tube coming in from the vac pump and the "quick-lock" seal I got from ACP. Works like a charm.

Final assembly means:
1) bonding the two halves together with the help of Clecos.
2) Then add cut a hole large anough for your arm where the tire sticks out.
3) Add 1-2 bid around the inside of the joint
4) Trim the flange around the outside
5) Fill gaps with micro/flox as appropriate
6) Add 1 bid around the outside
7) Now slice the pants in half with a razor saw where you want them to come apart. This is what you end up with:

Then you fill (micro or Bondo) then sand then fill then sand then fill then primer then fill then sand then primer then fill. Then plead forgiveness from the wife for the nightmare project you got into. In fact, the neighbors are coming to the conclusion that you are building
MIRVs or some other nuclear device in your garage. You can understand why when you see these odd things standing in the driveway! I finished off the wheelpants in Tennesee Red using a Glausarit Polyurethane.

We have recently noted that one of our suppliers is promoting an epoxy called "Poly Epoxy". It has not been tested and approved by the Rutan Aircraft Factory nor by us, and when we studied the physical properties, they do not appear to be as good as Epolite 2427. It is therefore not recommended!
Polyester resins, commonly used in boatbuilding, are not recommended, nor are vinyl resin systems.
With polyester resin systems, the ratio of catalyst to resin is not critical, because the amount of catalyst only determines the rate of cure. With epoxy resin systems, however, the ratio of catalyst to resin is very critical. Think of the resin as bolts, and the catalyst as nuts. To get the designed strength (and resistance to solvents), it is critical to have the same number of nuts as bolts! Therefore you must strictly adhere to the mixing ratio stated by the manufacturer. It is an advantage that Epolite 2427 has exactly the same mixing ratio as the Safe-T-Poxy it replaced.