


Marlene used the special effects Blur More and Dilate on her name.

Marlene created a collage using family photos by tracing around the subjects with the freehand selection tool. Then she copied and pasted the photo on a blank white image. Each photo was pasted as a new layer and therefore it can be moved around. She then added a bit of color and texture on the background layer.

Marlene created a stained glass image that looks pretty realistic usiing a pattern and colored glass fills.

Marlene created a stained glass image using her own stained glass patterns that she created using the Retouch Tool set to Smudge. She then used the Hue, Saturation, Lightness settings to colorize her patterns.

Marlene learned to create a simple mask by using the Freehand Tool. She drew a freehand jagged shape and double-clicked to close it and then used that shape as a mask on the rose.


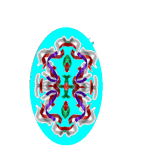
Marlene created an Kaleidoscope Easter Egg by using the Streamers Picture Tube and then the Kaleidoscope effect. She then animated the egg in PSP's animation Shop.
We will also review some concepts that we learned in the Intermediate class, like how to work with layers. Here Marlene pasted a photo of Jennifer in an image of a flower. She then used the Eraser Tool to paint over the pixels so that the flower would show through except for the area under the child's face.

Marlene worked on repairing this photograph of her father-in-law using the Clone Brush.


Marlene blened two photos into one by drawing a selection around each dog one at a time and the copying the selection into a blank image. she then added Picture Tube clouds to give a heavenly effect (since the dogs have passed on.)

Marlene created a nice effect by using the Cutout effext on text. this would make a nice greeting card cover.

Marlene learned how to create an interesting effect by pasting an image into an eye.
