
Marge created a collage using family photos by tracing around the subjects with the freehand selection tool. Then she copied and pasted the photo on a blank white image. Each photo was pasted as a new layer and therefore it can be moved around. She then added a bit of color and texture on the background layer.

Marge used a Diamond mask on a flower and then created a frosted effect by using the Mosaic glass effect. It's a great picture for spring!

Marge practiced making a Picture Tube out of Christmas clipart. She opened an image and then created a new transparent image the exact same size. Then she chose the Magic Wand tool and clicked in the background of the picture. This places the Marching Ants around the objects in the picture AND the outer rim of the image. She then chose Selections>Invert so that the Marching Ants only surround the objects in the picture. She copied the objects and then clicked the title bar of the transparent image and clicked Edit>Paste As New Selection. She positioned the objects so no part of them is cut off and clicked once with the mouse. After clicking Selections>Select None, she exported the image as a Picture Tube. The only thing she had to do in the Export Picture Tube dialog box was to give the tube a name. Then the tube was ready to use.

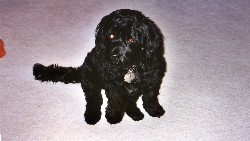
Marge used an image Tiger, her dog to create a Halloween picture.She pasted the image of Tiger as a new layer on top of the pumpkin layer and then used the eraser tool to erase the chair and other parts of the background so that the pumpkin layer showed through. She then added text. She used the Posterize Effect on her animation, which is on the Tripod website.

Marge created a fall wreath using Picture Tube leaves and other fall decorations. Each decoration was placed on a separate layer so that if changes are made to a particular item, the layer can be deleted and a new layer can be added. It is a good idea to always name your layers.

Stained Glass Collection
Marge created a stained glass flower. She had to click back and forth on a varitey of tools: the Magic Wand to select, she had to choose the stained glass color she was going to use next and then the Flood Fill tool to fill.

Marge made an ad for a trip to Rio by combining a parrot image with a beach background and then using the Eraser Tool to erase the background of the parrot image.


Marge learned a technique called Paste Into Selection by tracing around the eye. She then copied and pasted an image into the selection (eye) and experimented with the Opacity level so that both the eye and the picture would be visible.


Marge created a realistic looking block of wood using the paint brush tool and layers with different effects like Hot Waxed Coatings and Gaussian Blur to achieve the look of letters cut out of wood.

Marge learned how to create text with a reflection. She first clicked the text tool and typed in a word. then she flipped the image and used the deformation tool to make it appear slightly distorted. She added a gradient fill and then positioned the the same word above it.

We began the Chapter on layers and Marge created an image with each layer containing a letter of her name. She named each layer with the appropriate letter. She used the Mover tool to position letters in the correct order.She added butterfly layers. When we are finished, we must remember to merge the layers before we save the image.

Marge used the Circular Deformation effect on these roses.

Marge learned to take a photograph and then fill text with that image. Then she used the Picture Tube Tool to add some images.


Marge created some text graphics at home using PSP 7.


Marge learned to use the Deformation Tool with text. She dragged the handles of this tool while holding the Shift key down, Ctrl+Shift and Drag, or Ctrl+Shift+Drag to achieve different effects.

Homework
Marge completed some homework using the photo fill tecnique and also the Deformation tool.

