

Jeanne created some flowers using the kaleidoscope effect and then she tubed the flower and made this graphic.

Jeanne used a floral textured effect to create a frame for a mermaid.

Jeanne used a diamond mask to create a frame around a beautiful flower. She then gave it a frosted look by using the mosaic glass effect.

Jeanne created a wreath using PSP's Picture tubes that were placed on a circular form. She added a bow and she colorized it to match the other fall colors.

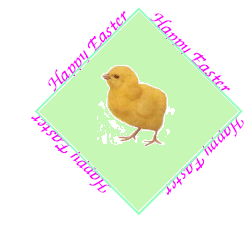
Jeanne learned to create a logo by creating a vector rectangle and then free rotating it 45 degrees. She then exported an Easter cheick picture tube abd placed text on the outside of the diamond shape. She had to tinker with the font and text size to make the text fit on the shape.
Jeannelearned how versatile masks are by creating a mask from a photograph this time. He used a duplicate image of the parrot, but deleted the image and added 2 bright colors instead. The photo of the parrot was the mask which allowed the colors to show though.


She created a mask and used the solorize effect on a sunflower.


Jeanne made an ad for a trip to Rio by combining a parrot image with a beach background and then using the Eraser Tool to erase the background of the parrot image.


Jeanne learned a technique called Paste Into Selection by tracing around the eye. She then copied and pasted an image into the selection (eye) and experimented with the Opacity level so that both the eye and the picture would be visible.

The practical application of the Clone Brush is to use it to repair photos as Jeanne did with the photos of the ladies.


Jeanne used the Clone Brush tool to retouch a photo. She cloned the water and painted over the thumb.


Jeanne used the Hue Saturation Lightness settings and Clone Brush to experiment with this lovely vintage photo.


Jeanne added text to a photo and theoretically, she could have matched the blue in Gary's boat exactly because when you are in the Color Selection box and move the mouse pointer over an open image, the mouse pointer turnes into an eyedropper and picks up the color. However, what appeared to be blue, in this case, was really a gray.The only thing you can do is try to match the color as best you can.


Jeanne blended two photos into one by sending Gary to the boat launch.


Jeanne used a technique that would work very well for the front of a birthday card. She selected the person by using the ellipse selection tool and then pasted the image into a blank transparent image and applied a textured background. Then she applied a Cutout effect and Drop Shadow so that it looks as though the text was cut out of the background.

Jeanne used the colorization technique to change the colors of Zachary's shirt. She also cropped the picture.


Jeanne also used the colorization technique on her grandmother's dress.

Jeanne used the colorization technique on the kitty.


Jeanne used the Deformation Tool to give a framed picture a three-dimensional appearance.

Jeanne did more homework to practice using layers. She used the Smart Edge option for the Lasso Tool to make a selection around an eye and then she pasted an image into the selection. She saved the selection to an Alpha Channel to use it again on the same eye. The Opacity slider can be moved so that the eye shows through a bit.

*****If you want to save any of these images to your hard drive, right click on the image and then click Save Picture As. Then click the folder where you want to save the image. (You should save all the pictures from your class in a folder.) Click Save button. At that point, if you want to save them on a floppy disk, right-click on the folder and then click "Send To 3 1/2 Floppy."
