![]()
![]()
![]()
![]()
![]()
![]()
![]()
![]()
![]()
![]()
![]()
![]()
![]()

Comet Tail Name Tutorial
PSP 7
You will need EyeCandy 4000 for this tutorial ~ you can get it here.
(1.) Open a new transparent image, 16.7 million colors, 400 x 400.
![]()
(2.) Choose what colors you want your name to be on your color palette. I used (#C0FFC0) for my foreground color and (#D128F0) for my background color. Also, you might want to find what tubes you would like to use on or around the name.

(3.) Now click on your text tool on the left hand side toolbar.

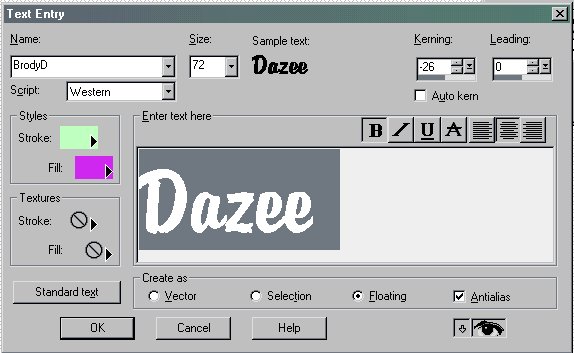
(4.) Now click anywhere on your transparent image and the text entry box will pop up like below. Type in the name you want and then click ok. Make sure that your floating and antialias boxes are checked. You can use whatever font you would like, I used BrodyD. It is better to use a wide font.
(5.) Now your name should look like the capture below with ants marching around it.

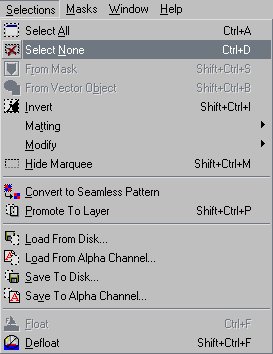
(6.) Now goto selections > select none ~ see capture below.
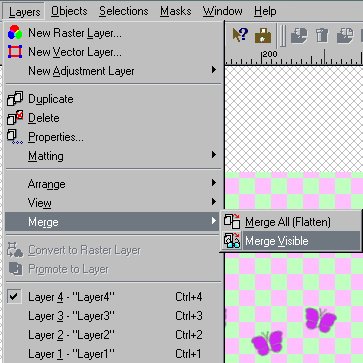
(7.) Now you can place tubes above your name or just leave your name without any tubes. If you use tubes goto layers > merge > merge visible.
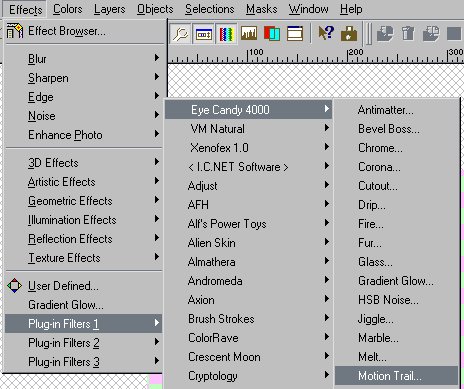
(8.) After you've merged all of your layers goto Effects > Plugins > EyeCandy4000 and select Motion Trail.
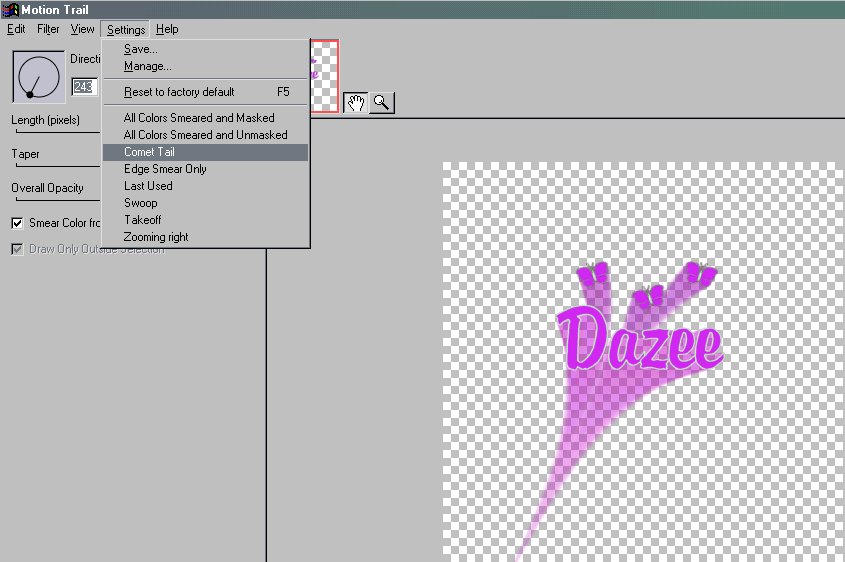
(9.) A box like below will pop-up. Now, goto the top bar and select settings > comet tail then click ok.
(10.) Now you are done. This is what I come up with.

Hope you enjoy !! If you have any questions please feel free to email me at the link below.
Hugs,


Copyright 2000 Dazee's Attic of Treasures ©. All rights reserved

![]()
![]()


![]()


![]()
![]()