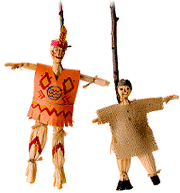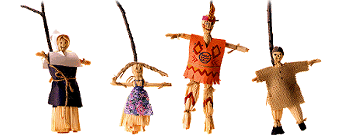
Exerpt reprinted from Six Easy Thanksgiving Crafts from Family.com: Familyfun Magazine.
MATERIALS:
Corn husks*
Large bowl of water
Twine or string
Scissors
Construction paper
Watercolors or markers
Glue
INSTRUCTIONS:Step One.
Soak your corn husks in warm water for about an hour until they become pliable.Step Two.
Gather several damp husks and tie them together tightly with twine, about 1/2 inch from one end.Step Three.
To make the head, hold the knotted end in one fist, then fold the husks down (as though you were peeling a banana) so that they cover the knotted end. Smooth out the husks to make a face, then secure them with a piece of twine around the doll's neck.Step Four.
To make the arms, roll up a single husk and tie it off at both ends. Position the arms up between the husks, under the doll's neck. Smooth the husks over the arms to form the chest and back, then cinch in the waist with twine.Step Five.
For a skirt or legs, arrange several husks, inverted (like a skirt that has blown up over the doll's head) around the waist. Secure with twine, then fold the skirt down. For legs, divide the husks into two parts, tying each bunch at the knees and ankles. [end exerpt]Step Six.
Dress and decorate using materials to hand. The craft suggests making clothes, hair, and headdresses out of construction paper and painting on a face and other details. You may also use scraps of cloth for clothing, the corn silk for hair (stiffen with a fixative so that the material will not breakdown as readily), or use commercially sold doll hair available at your local craft store.* The husk of the corn are the leaves that surround the ear, not the cob. Dried corn husks are available at craft stores, but you may recycle the inner husks of corn from the dinner table.
-- Submitted by MGonzalez01
This page and its graphics were created by
exclusively for The Yahoo! Crafter's Place Chat Club.
It is best viewed on a 800x600 screen set for True Color
withor
and
is hosted by. Get them NOW!


