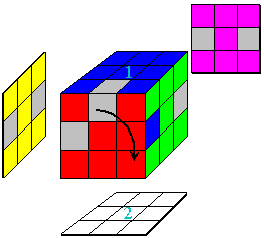
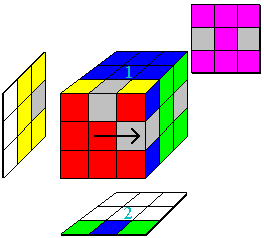
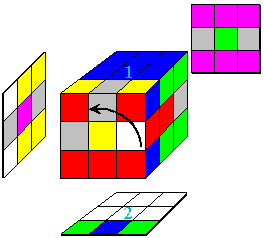
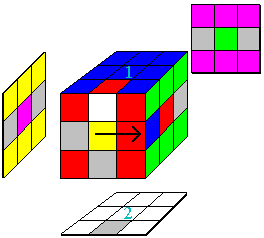
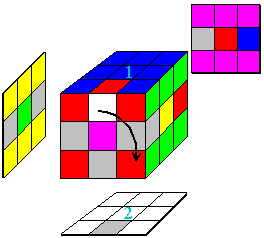
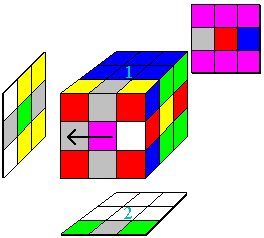
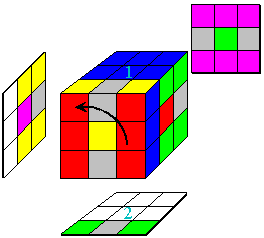
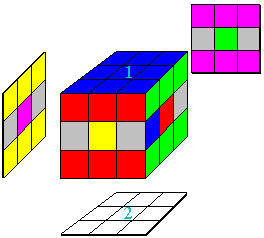
| Move 5: F H-1 F-1 H-1 F H F-1 | ||

|

|
|
| F: Rotate the front clockwise | H-1: Rotate the middle horizontal slice counterclockwise one turn | |

|

|
|
| F-1: Rotate the front counterclockwise | H-1: Rotate the horizontal slice counterclockwise one turn | |

|

|
|
| F: Rotate the front clockwise | H: Rotate the horizontal slice clockwise one turn | |

|

|
|
| F-1: Rotate the front counterclockwise | The move is complete, and has filled in the keyhole | |
Continue solving the Rubik's cube.
Contact info: I appreciate receiving e-mails describing your success with these directions, but I cannot provide any additional help in solving the Rubik's cube beyond the instructions and steps shown here. Please also e-mail if you have problems accessing a page or seeing a graphic.

These pages are mirrored at http://www.alchemistmatt.com/ and http:/www.geocities.com/alchemistmatt/.
Last Modified April 17, 2002