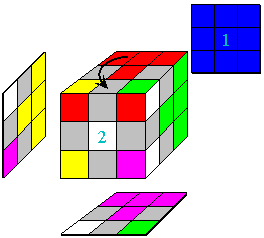
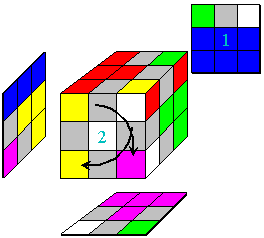
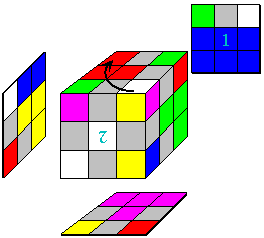
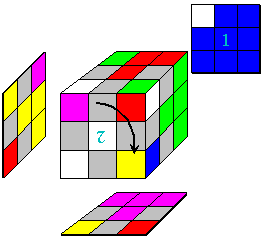
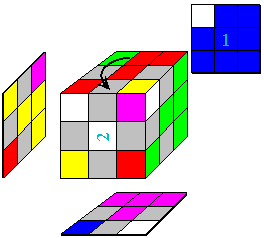
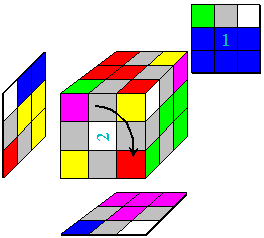
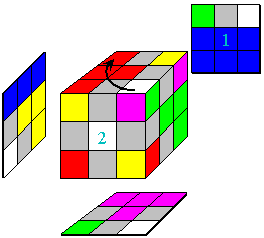
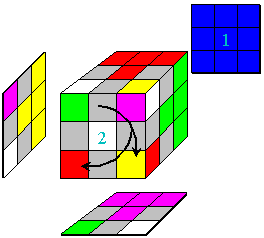
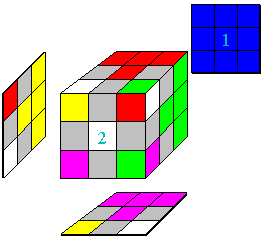
| Move 2: U-1 F2 U F U-1 F U F2 | |

|

|
| U-1: Rotate the top counterclockwise | F2: Rotate the front clockwise twice |

|

|
| U: Rotate the top clockwise | F: Rotate the front clockwise |

|

|
| U-1: Rotate the top counterclockwise | F: Rotate the front clockwise |

|

|
| U: Rotate the top clockwise | F2: Rotate the front clockwise twice |

|
|
| The move is complete, and has rotated (twisted) three of the front corner pieces. This move will probably need to be performed a few times, orienting the cube to correspond with figures 4 through 7 each time. | |
Continue solving the Rubik's cube.
Contact info: I appreciate receiving e-mails describing your success with these directions, but I cannot provide any additional help in solving the Rubik's cube beyond the instructions and steps shown here. Please also e-mail if you have problems accessing a page or seeing a graphic.

These pages are mirrored at http://www.alchemistmatt.com/ and http:/www.geocities.com/alchemistmatt/.
Last Modified April 17, 2002