9 And now, to make them
look as though they are intertwined instead of overlapping.
The rings intersect at 2 points. at both the top and bottom intersection, the
right ring passes in front of the left. What we need to accomplish is for the
top intersection to remain as it is with the right ring in front, but at the
bottom intersection of the rings, the left one needs to be in front of the right
one.

10. Drag layer 1 copy to
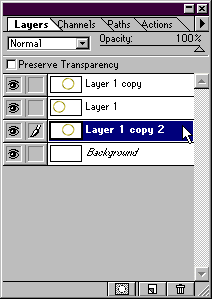
the new layer icon creating a third ring. This will be layer 1 copy2.
11. In the layers palette, drag layer 1 copy 2 to the position below layer 1, and above the background.

12.Click the mouse on layer 1 copy, to make sure it is the active layer. Click on the eraser tool in the toolbar and select a medium hard brush from the brushes palette.
13. Be sure that preserve transparency is unchecked, and then erase the part of the right ring that passes in front of the left at the bottom intersection.(see illustration) Don't worry about being perfect here, or erasing a little too much because you have an exact copy of the ring directly beneath the one you are erasing..just be sure to erase all of the small section that covers the ring on the left.(circled in red).

14. And that is it. Now you can make a whole chain..or a logo, or tie ribbons around letters, whatever your imagination can come up with.
