|
|
|
|
|
|
Speed controllers are necessary so that the robot can have adjustable speed. Speed controllers act like the accelerator pedal on a car, without them the robot would have two speeds: at a stand still and full pelt.
When at the early design stage of our robot we only knew of one kind of speed controller, the mechanical kind found in most radio controlled cars. These consist of an arm which moves along a resistive strip of metal. These controllers are cheap and are great if you are only running a few amps through them. However motors in Robot Wars can draw hundreds of amps, meaning the controllers would be seriously under rated and would act less like speed controllers and more like an electric fire!
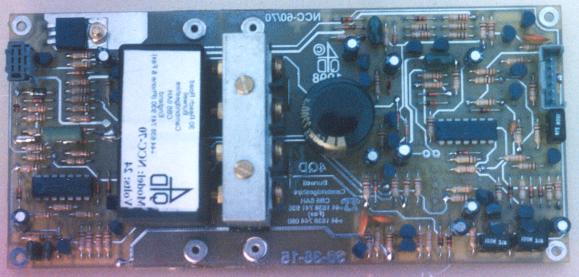
Electronic speed controllers consist of printed circuit boards using PWM to adjust the output voltage. These controllers are capable of handling hundreds of amps whilst remaining small enough to put in your (large) pocket, while the corresponding mechanical controller would be HUGE.
After phoning several companies that supply electronic speed controllers and receiving lots of information through the post, we decided to buy our controllers
from 4QD. 
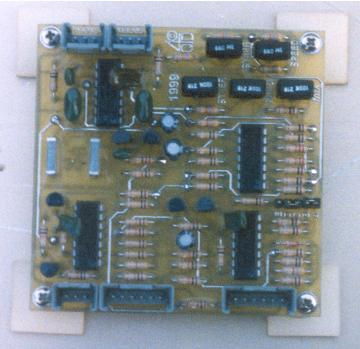
Below is a dual axis interface board, which interfaces the controllers with the potentiometers (variable resisters) which are turned to control the speed of each controller. This is the new interface board which allows you to swap between tank style steering and sum and difference steering. We are using tank style steering, where each stick on the transmitter controls a separate side of the robot. For example: pushing the left stick forward makes the left hand side motors drive forwards. While pushing the right stick forwards makes the motors on the right hand side of the robot drive forwards.

|
|
Pushing both sticks forwards makes both tracks (or sets of wheels) run forwards. This makes the robot go forwards. |
|
|
Pulling both sticks backwards makes both tracks run backwards. So this makes the robot go backwards. |
|
|
Pushing the left stick forwards makes the left track run forwards whilst the right remains still. This makes the robot curve to the right. |
|
|
Pushing the right stick forwards makes the right track run forwards whilst the right remains still. This makes the robot curve to the left. |
|
|
Pushing the left stick forwards and the right stick backwards, makes the robot spin round to the right on the spot. |
|
|
Pushing the right stick forwards and the left stick backwards, makes the robot spin round to the left on the spot. |
We are protecting the interface board in its own aluminium box. To keep the tracking on the board from shorting on the aluminium and to stop it rattling about we attached plastic sticky feet to the corner mounting holes on the board.
The servos for the radio gear are connected to pots (potentiometers) which are in turn connected to the interface board. Originally we tried to use 4QD's special 50 degree pots, which sound ideally matched to the rotation of a servo. However when wired up the amount of tracking actually used is about 10 degrees. This makes the controls very sensitive, so we changed to standard 280 degree pots. The amount of tracking used on these are well matched to the servos. Many teams have used miniature plastic gears to connect their pots to servos, we bought knobs for the pots and glued them to a round servo arm. The knobs have a set screw to tighten them to the shaft of the pot, this allows easy adjustments.
![]()